Showing posts with label cooking. Show all posts

Sunday, 4 September 2011

Plumella

While recently searching for ways to use up the sack of damsons I was given by a friend, and tired of making chutney and jam, I re-discovered this amazingly easy-to-make but seriously tasty spread. I find Nutella much too rich and I've grown an aversion to vegetable oil in various products. This is less greasy (the only fat comes from the cocoa), and considerably less sweet. The damsons replace the greasiness of the nuts and oil with a more grown-up after-taste of fruity tartness, and the genuine taste of chocolate dominates and means that delicious as this is, you're not going to eat huge quantities of it before feeling sated.


There's a bit of political history attached to this recipe.

Back in the 1970s when Nutella hazelnut and chocolate spread was conquering the world and kids' palates, one part of the world it didn't reach was Eastern Europe.

While some rough chocolate did get through to that market, there were chronic shortages of almost all of the other ingredients, and of course of the branded product itself. However, those inventive and improvising Poles came up with a replacement for the hard-to-find nuts and sugar, and developed an alternative. it was never sold in shops and doesn't have a brand name, but most Polish families with children in 70s were aware of this.

I made this last week and as usual with my experiments took photos of the process but something went wrong and I've lost all the pics. I've managed to find some some replacements online which will have to do...

Ingredients:

2.5kg damsons, bullaces or plums, or combination thereof
1kg sugar (plus potentially another 500g for taste)
200g quality cocoa powder (or 300g high cocoa-solid [70%+] chocolate)
1 tablespoon vanilla extract (NOT "flavouring")

Optionally:
Handful of nuts of your choice
1 stick cinnamon or one teaspoon ground cinnamon
 How to make it

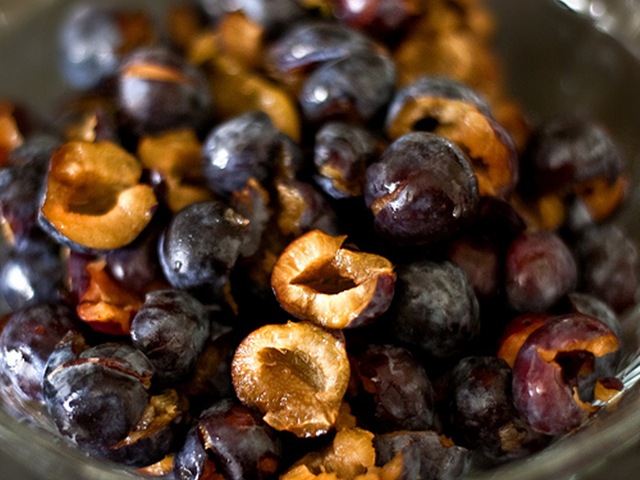
First pit your damsons. this is going to take a long time, as the stones are proportionately quite large, and the flesh is usually fairly tightly stuck to them.


Put the damson flesh through a mincer, grinder or blender until finely puréed, together with chopped nuts (if used).


Empty the purée into a thick-bottomed 5-litre stainless steel saucepan.

Stir in 1kg sugar, mix well.

Add cinnamon stick or ground cinnamon, if using.

Put on low simmer, uncovered, stirring occasionally. Surprising as it may seem, this will not stick to the pan and can be left for extended periods without stirring. The stirring is just to keep the liqiuid and solids well mixed.


After 90 minutes, take out a spoonful of the mixture, allow to cool and taste for sweetness, tartness and texture. (Beware, the liquid out of the pot will be around boiling temperature!) Depending on the ripeness of your fruit and your own taste preference, stir in up to 500g more sugar.

Continue simmering for another 30 minutes if you did not add sugar, or 60 minutes if you did.


Add cocoa powder or chocolate broken into pieces, and stir well with a whisk until completel dissolved.

Stir in vanilla extract.

Continue simmering for another 10 minutes until the cocoa has cooked through and lost its raw bitterness.

In the meantime, wash, sterilise and dry six 500ml jars (see instructions provided in eafrlier blogs, or look them up online)

If desired, put mixture through blender/liquidiser again to make it super-smooth, return to pan and simmer for five minutes.

Pour into the sterilised jars, cover with cellophane circles and tighten covers.

Ready to eat immediately, warm or cold, as a spread on bread or cakes, as a filling for doughnuts or spooned on pancakes!

This spread does not want pasteurising/proofing (boiling would ruin the chocolate), and will keep for up to three months in a cool dark larder or cupboard. Once opened, store in fridge (unlike Nutella, which should never be refrigerated!) and use within two weeks.

Enjoy! I certainly do!

Wednesday, 21 July 2010

Gooseberry Jam!

I've been going on on Twitter about our gooseberry harvest this year and my attempts at making jam. Some people have asked for instructions, so this is how I did it! These pictures are from my second attempt - the first had been the day before and I learned a few lessons from it.


Step 1: Gather your gooseberries

Step 2: top and tail the fruit - it's easiest to use scissors!


Step 3: wash well under running water


Step 4: weigh. In my case, remove and eat excess so there's an even 1kg left!


Step 5: The normal rules of jam-making with soft fruit is to use at least the same weight of sugar as fruit (1kg - 1.2kg sugar to 1kg of fruit). I discovered the night before that these gooseberries are sweet and ripe enough, and the jam came out too sweet and sickly, so I reduced the amount of sugar to 800g. Also, I like the smokey flavour of unrefined sugar so I used 50/50 white and demarara.


Step 5: Measure 80% in litres of cold water of the weight in kilos of fruit - in this case 800ml.


Step 6: Put fruit and cold water into a heavy saucepan, and bring to boil. Also turn on your oven, on its hottest setting.


Step 7. While that's happening (about 2 mins) start washing enough jars with lids to take 150% of the weight of raw fruit (in my case, 1.5kg) in the hottest soapy water you can muster, in a clean bowl. Leave to soak.


Step 8. As soon as mixture starts boiling, bring down to a slow simmer and keep stirring until the fruit starts falling apart (another couple of minutes)


Step 9. Check all fruit has softened, and then add sugar while slowly stirring - preferably with a wooden spoon (and it's still barely simmering)....


... Continue stirring until you can feel absolutely absolutely all the sugar has dissolved (a minute or so).


Step 10. When all the sugar has dissolved (and not a moment sooner) bring the mixture to a rapid full boil, as hot as possible. When it starts boiling, set a timer for fifteen minutes.


Step 11. While the mixture is boiling, complete washing the jars and lids as scrupulously as possible and rinse out in the hottest water you can manage (in my case, straight from the kettle)


Step 12. Do not wipe the jars, but shake off excess water, switch off your (hot) oven (you DID switch it on earlier, didn't you?) and put your jars and lids inside upside down to dry out and keep warm.


Step 13. Cookery books and jam-making recipes make a big deal about temperature. And it's true, the mixture should boil at over 100-110°C but you should be OK by keeping it rolling for 15 minutes. Also, there are things like the wrinkle test to ensure it's ready, but I've not bothered during my past jam-making experiments and I've been OK.


Step 14. If desired, seive the boiling mixture into another clean saucepan if you want clear jam/jelly with no "bits". I'm going to make one 300g of clear jam and leave the rest with the bits...


... Return the seived clear liquid to the boil for another minute or two. Remove any scum that forms from the top of both saucepans before...


Step 15. ... pouring it into jars. Fill jars to the very brim so that there is no air in there to create condensation - condensation causes mould!

The clear/bitless jar is at the back on the left. I couldn't take any pictures of the bottling process as I only have two hands and it needs to be done quickly! Do not be surprised if the jam isn't very thick straight away, it might even need several hours after it's completely cold!

If I had any expectation that my jam would be standing around for any length of time I'd do the right thing and seal them with a waxed circle and a cellophane membrane before putting on the lids, but I fully expect none of my jam to be standing around for more than a couple of months - it will be fine in a fridge for that long! (I have now found homes for all but one of the jars!)

Last but not least, I didn't take a picture, but put a label on your jars listing the contents and date of production (for stock rotation purposes).

I hope this has been helpful - please let me know if you've tried this recipe and whether or not it worked!